Nursing Facility Post Eligibility Treatment of Income (PETI) Prior Authorization Request (PAR) Submission
This Quick Guide provides step-by-step instructions on how to submit a Nursing Facility PETI PAR on the Provider Web Portal.
The electronic PAR form must be completed in a single session. Partially completed forms cannot be saved. Portal users should follow these instructions carefully and in the order provided.
- Log in to the Provider Web Portal.
- Click the Care Management tab, then click Create Authorization.
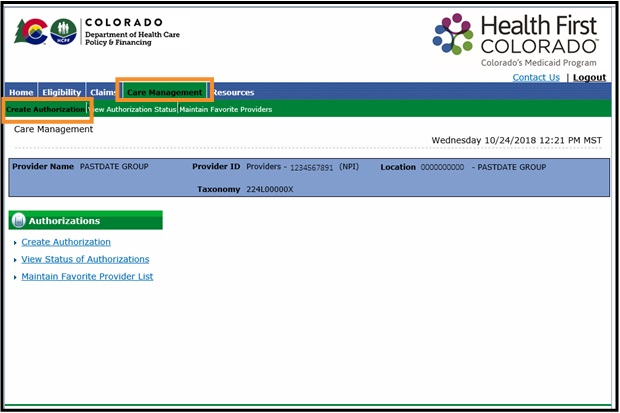
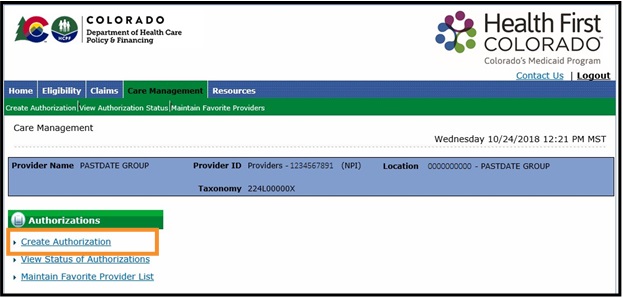
- Click the Create Authorization link.
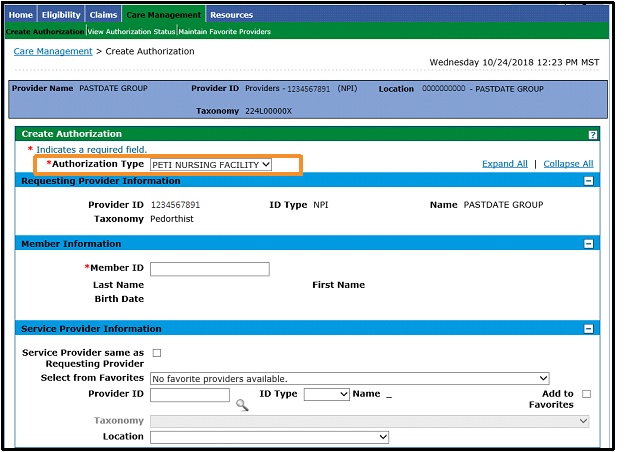
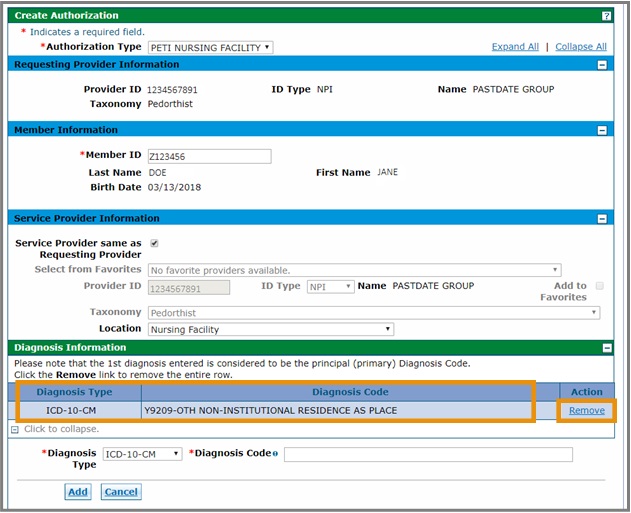
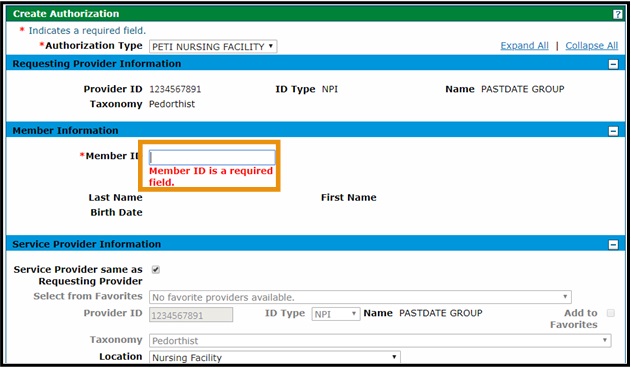
- On the Create Authorization page, use the drop-down arrow to select the Authorization Type "PETI NURSING FACILITY."
Under the Member Information section, enter the Health First Colorado ID in the Member ID field using a capital letter (example: Z123456).
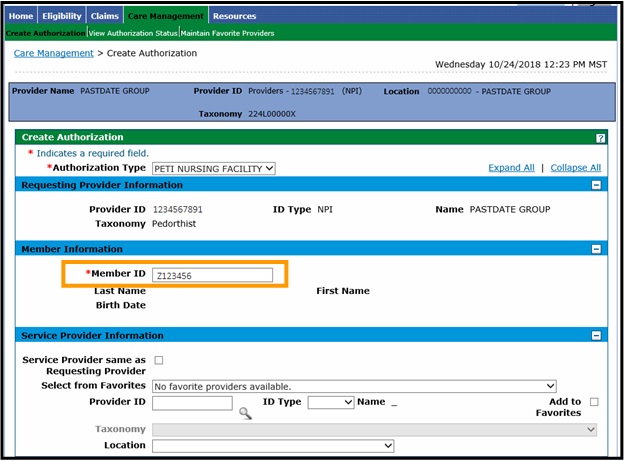
Use the Tab key on the keyboard to populate the Member Name and Birthdate information.
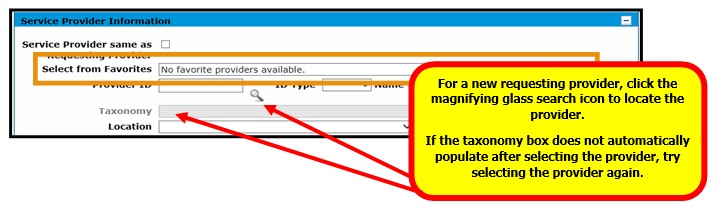
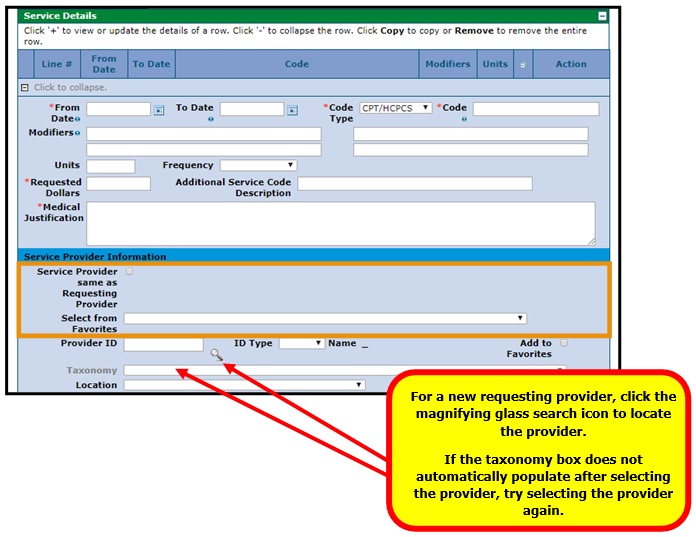
- Under the Service Provider Information section, the requesting provider should select the corresponding checkbox or use the "Select from Favorites" drop-down menu.
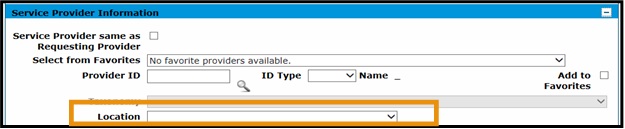
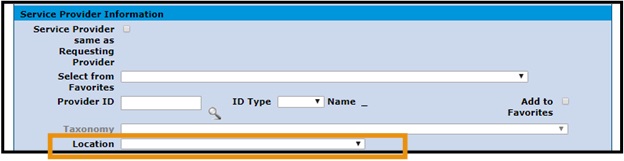
Use the drop-down box to select the Location.
Select the appropriate Location type: Skilled Nursing Facility, Nursing Facility or Intermediate Care Facility.
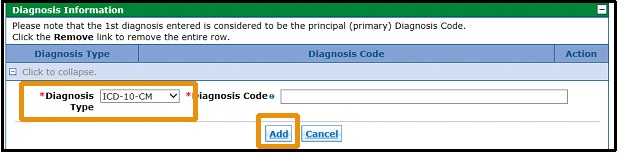
Under the Diagnosis Information section, select ICD-10-CM from the drop-down list for Diagnosis Type, then enter the appropriate code in the Diagnosis Code field. Click "Add" once complete.
Select the appropriate Diagnosis Type code from the drop-down list, based on where the service was provided:
- Y9209 Other Non-Institutional Residence as Place
- Y9212 Nursing Home as Place
- Y9219 Other Residential Institution as Place
- Y92531 Health Care Provider Office as Place
- Y929 Unspecified Place or Not Applicable
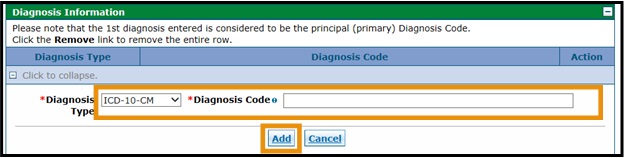
Type in the Diagnosis Code number (include the capital letter), then click the "Add" button. Only one diagnosis code is required, however this process may be repeated as needed.
Once the diagnosis has been added, the information will populate in the table. If the diagnosis information is not correct, click "Remove," then repeat this step to add the correct code.
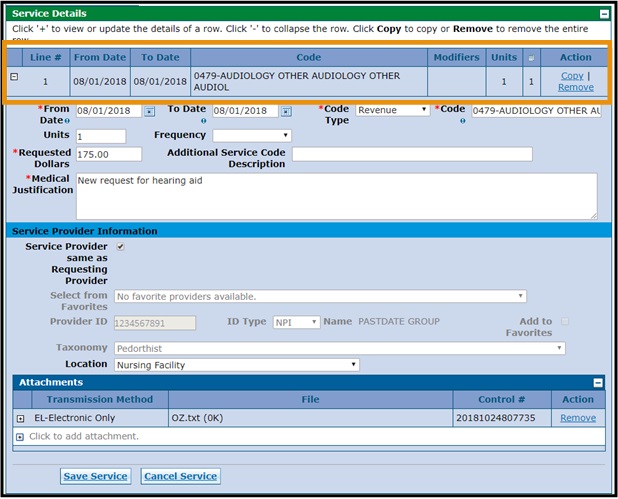
- Under the Service Details section, click the calendar icon to select the From Date and To Date.
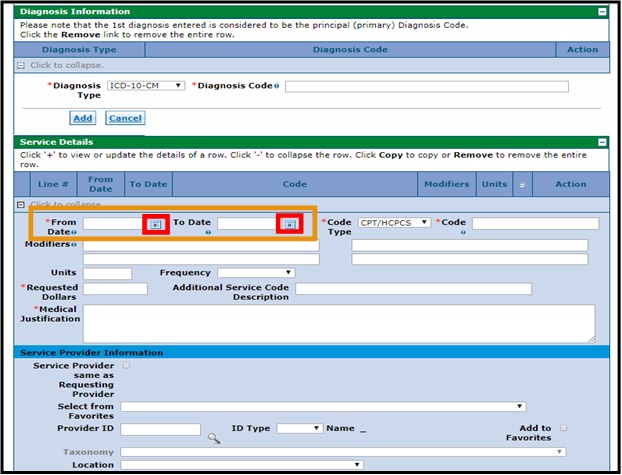
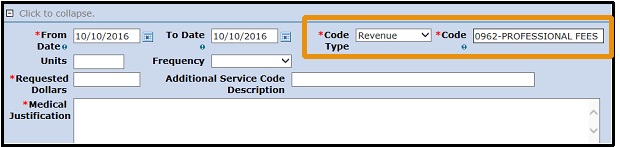
Use the drop-down arrow for the Code Type field to select Revenue, then enter the appropriate code in the Code field. Type in the code number. When the correct description associated with the code appears, select it to populate the Code field.
Procedure codes are not valid for Nursing Facility PETIs and will result in PAR denial. A revenue code must be provided.
Once the Revenue Code Type has been selected, the Modifier fields (as shown in the screenshot in step nine of this guide) will disappear.
Select and enter the appropriate revenue code from the list below:
- 0259 - Pharmacy Other Drugs (non-prescription drugs)
- 0479 - Audiology Other (hearing)
- 0949 - Acupuncture
- 0962 - Professional Fees Ophthalmology (vision/glasses)
- 0969 - Professional Fees Other (dental, etc.)
- 0982 - Professional Fees Outpatient Services
- 0999 - Patient Convenience Items (Health Insurance)
- Enter the number of units in the Units field.
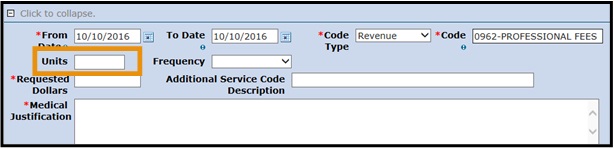
- For eye glasses, enter 1 [unit].
- For hearing aids, enter 1 or 2 [units], as appropriate.
- For health insurance premium, enter 1 to 12 [units], based on the number of months being requested.
- For any other type of service, enter the appropriate unit measurement.
Enter the Requested Dollars value.

Enter the full dollar amount requested, which should match the invoice total.
For health insurance premium, multiply the monthly amount by the number of months, then enter the total.
This value cannot be zero.
Fill out the Medical Justification text box.
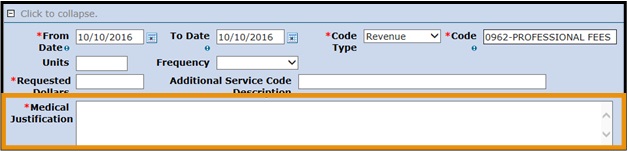
For health insurance premium, note the monthly premium dollar amount and the number of months being requested (i.e.: Health Insurance $150 for 6 months).
For anything other than health insurance, include one of the following prompts, followed by a detailed description:
- New request for…
- Replacement for…
- Second request for…
- Other Incurred Medical Expense: …
This text box cannot be left blank.
- Under the Service Provider Information section, the requesting provider should select the corresponding checkbox or use the drop-down menu to Select from Favorites.
Use the drop-down menu to select the Location.
If the member is on Hospice, select the Hospice value from the drop-down menu.
If the member is not on hospice, select the most appropriate value from the following list:
- Mobile Unit
- Independent Clinic
- Public Health Clinic
- Rural Health Clinic
- Skilled Nursing Facility
- Nursing Facility
- Intermediate Care Facility
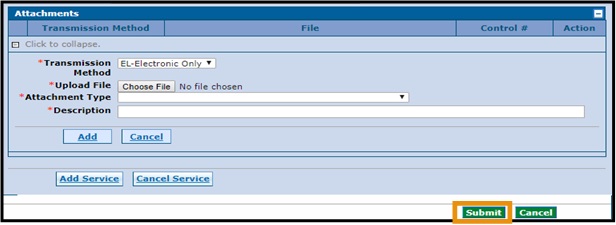
Under the Attachments section, use the drop-down menu to select the Transmission Method.
Click the [+] or [-] symbols to open and close the attachments list as needed. Click the [+] symbol in the first row to add an attachment.
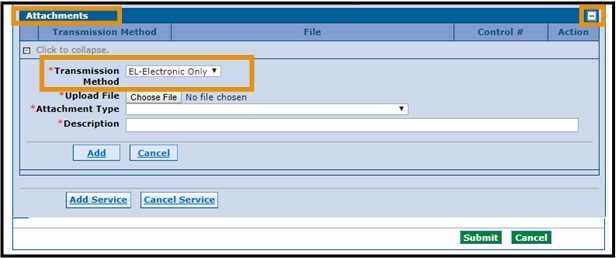
Click Choose File to select the attachment.
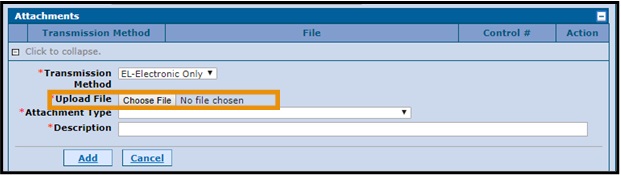
Attachments must be uploaded as a single PDF document. Steps 16 - 20 in this guide must be repeated for each required document.
Required documents may include:
- Hospice
- Signed Medical Necessity form
- Invoice with treatment codes
- Audiology report
- Health Insurance benefits and card
- Select "77 – Support Data for Verification" from the Attachment Type drop-down menu.
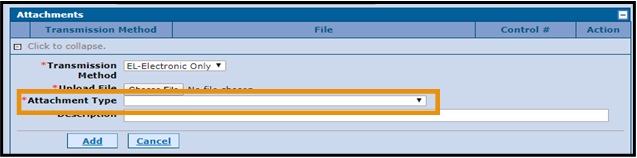
Enter the appropriate description in the Description field. Once complete, click the "Add" button.

Select and enter the most appropriate of the following descriptions in the Description field:
- AT – Itemized invoice for…
- CK – Medical necessity form
- 77 – Insurance premium data, supporting documents
- Ensure that the attachment appears in the table. If incorrect, click "Remove" to remove the incorrect attachment and add the correct attachment. Repeat the attachment process for as many documents as are needed. Once complete, click the "Add Service" button.
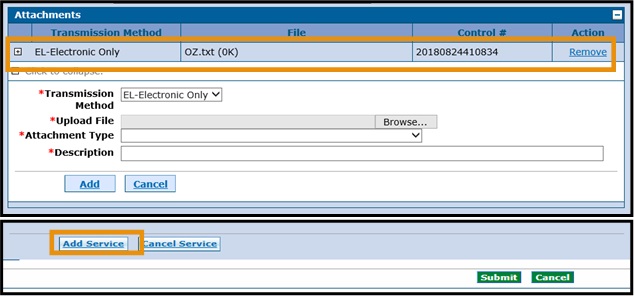
Scroll back to the top of the Service Details section heading to check that the service added now appears in the table. If incorrect, click "Remove" to remove the service and add the correct service.
To view information submitted, click the [+] symbol next to the line number. Click the [–] symbol to close it.
Note: Only one type of service request is permitted per NF PETI Request.
- Once complete, scroll back to the bottom of the Service Details section and click the "Submit" button.
- Review the information entered on the page. Click the "Back" button to make corrections, then repeat all other steps up to clicking the "Submit" button.
If an error message appears, fix the errors, then click the "Submit" button again.
Error messages will appear in red. See the example shown below.
- If no errors are identified, the "Submit" button will be replaced by the "Confirm" button. After verifying that all information shown is correct, click the "Confirm" button. Click the "Back" button if corrections are needed.
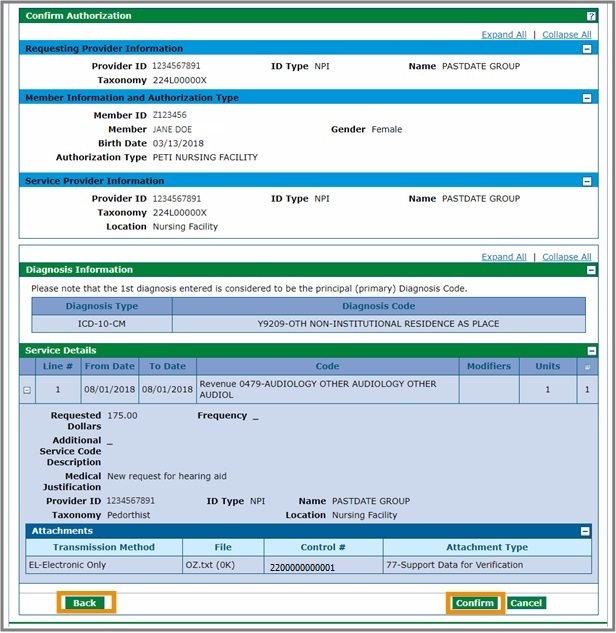
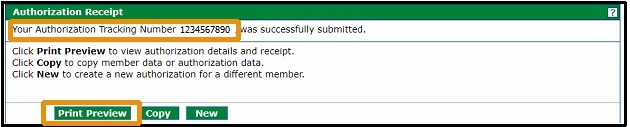
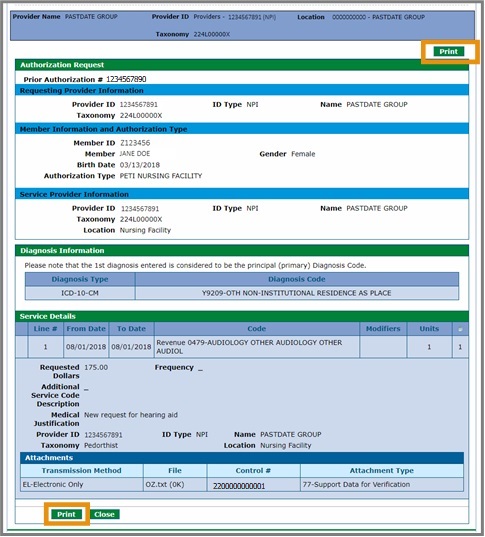
Note the Authorization Tracking Number provided under the Authorization Receipt section. Click the "Print Preview" button, and use the + buttons to display all details. Print this page for records and audit purposes.
The form and all attachments should be kept for six years.
The PAR is now in the Pending – State Review status.
Check the PAR status as needed.
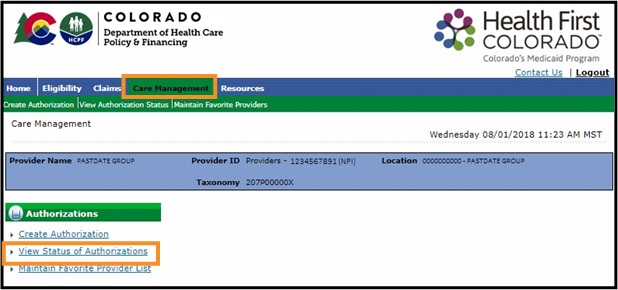
To check the status of the PAR, click on the Care Management tab from the Provider Web Portal home page, then click the View Status of Authorizations Link.
On the Medical/Dental Search tab, type the Authorization Tracking Number (refer to step #26) into the Prior Authorization # field, then click the "Search" button.
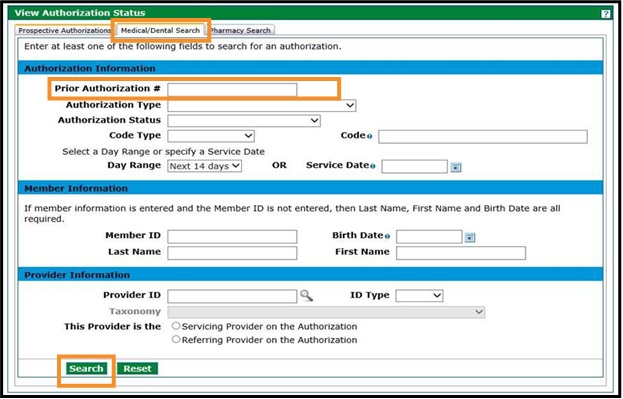
Scroll down the page to view the Search Results section, which will display the PAR details along with its current status.

PAR forms must be approved by the Department of Health Care Policy & Financing (the Department) before the PETI/IME (Incurred Medical Expenses) can be submitted on a claim in order for the claim to be paid by Health First Colorado. The Department’s Nursing Facility Operations Specialist or designee will determine if the PETI/IME request meets the requirements necessary to approve the request. After the review, the status will change to approved, approved – with revisions or denied. The Provider Web Portal will be instantly updated with the final determination and a letter will be system-generated for mailing the next day.
Submit a new request and include all required documents if the PETI/IME request is denied. The denied request cannot be re-opened.
Authorization cannot be revised once approved. To revise an existing authorization, contact the Provider Services Call Center.
Once the PAR status has been changed to approved or approved – with revisions, the facility can bill Health First Colorado (Colorado’s Medicaid Program) for the service or item. Refer to the Nursing Facility Billing Manual for further billing instructions.
Need More Help?
Visit the Quick Guides web page to find all the Provider Web Portal Quick Guides.