Link the Trading Partner Identification (TPID)
The Trading Partner ID (TPID) can be linked to the Provider Web Portal account if the provider has a TPID.
Follow these instructions if planning to use the TPID to send and receive files (including the 835) for one (1) unique location (one [1] Provider Web Portal registration).
Note: A TPID is needed to pull an 835 because it is an X12 HIPAA-compliant file. The Remittance Advice (RA) may be pulled without a TPID.
Follow the instructions on the Electronic Data Interchange (EDI) Support web page to enroll as a Trading Partner if a TPID is not available.
Linking a TPID to a Provider Web Portal Account
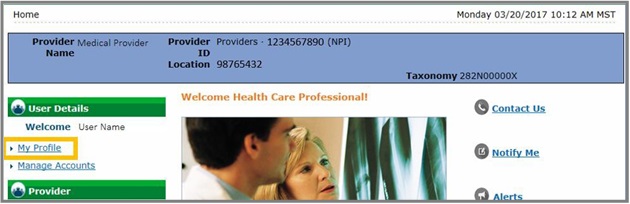
- Log into the Provider Web Portal.
- Click My Profile.
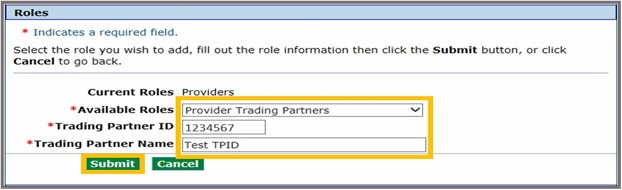
- Click Add Role.

- Select Provider Trading Partners from the drop-down, enter the Trading Partner ID and Trading Partner Name, then click Submit.
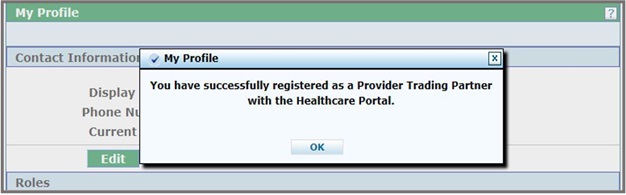
- Click OK to close the confirmation box.
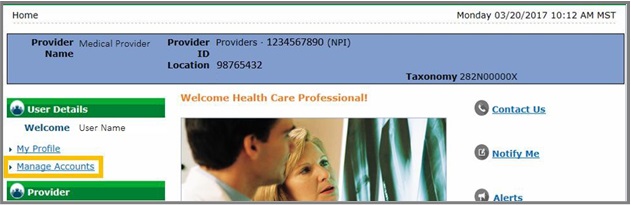
- Return to the Provider Web Portal home page and click Manage Accounts.
- Open the Link Registered Trading Partner ID for X12 Reports tab.

Select the Link My Trading Partner ID checkbox.
Note: The TPID will pre-populate into the Trading Partner ID field.

- Click Validate Trading Partner.

- Select the boxes next to the reports the user wishes upload or download as the Trading Partner, then click Submit.
Note: Only the reports that passed testing will display.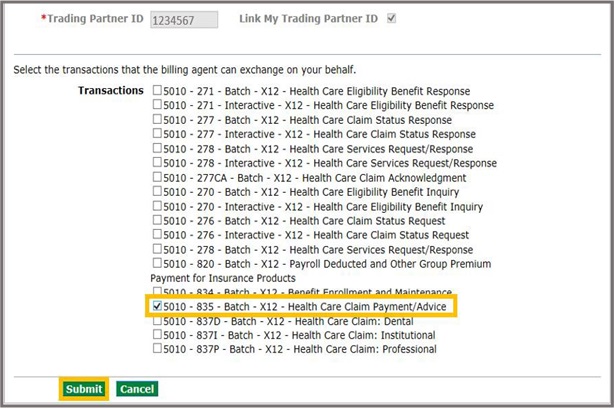
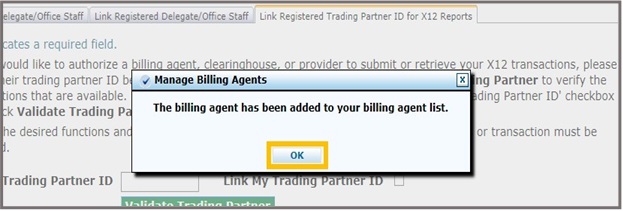
- Click Confirm.

- Click OK to close the confirmation box.
Download an 835 (or other X12 Report)
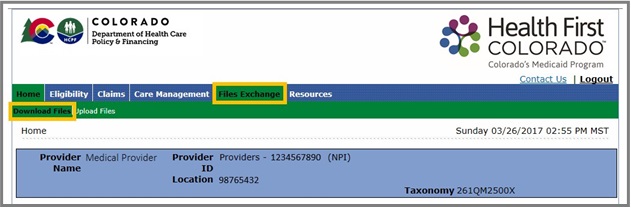
Click Files Exchange and then click Download Files on the Provider Web Portal home page.
Note: The Files Exchange tab may not appear if the TPID was just linked. Log out and back in if this happens.
- Select whether to download a new file or a previously downloaded file in the File Status drop-down.
- Select the file type in the Category drop-down.
- Enter the date range in the From Date and To Date fields.
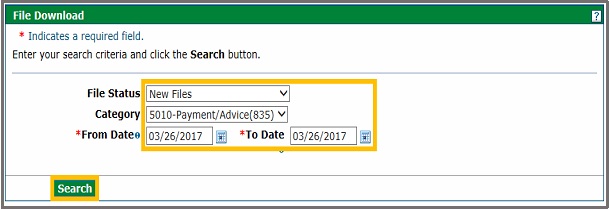
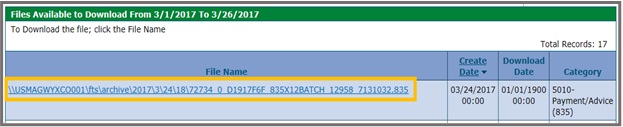
- Click the File Name link to download the file.
Click Open or Save for the downloaded file.
Note: The screen may appear different than the image below due to individual browser/computer set-up.

Need More Help?
Visit the Quick Guides web page to find all the Provider Web Portal Quick Guides.